


Essential Steps When Switching to the Standby High-Pressure Pump| Insights by AQUALITEK
Switching to a standby high-pressure pump in an RO system requires strict procedures. This Best-practice guide explains essential steps to ensure safety, membrane protection, and stable system performance.
- Introduction
- Why Proper Pump Switching Is Critical
- Step 1: Confirm the Reason for Switching
- Step 2: Gradually Reduce Load on the Running Pump
- Step 3: Stop the Running Pump Properly
- Step 4: Inspect the Standby Pump Before Starting
- Mechanical Checks
- Valve Status
- Electrical Checks
- Step 5: Fully Vent Air from the Pump and Pipeline
- Step 6: Start the Standby Pump at Low Load
- Step 7: Slowly Restore Normal Operating Conditions
- Step 8: Closely Monitor Key Parameters After Switching
- Common Mistakes to Avoid During Pump Switching
- Best Practice Recommendation
- Conclusion
Introduction
In industrial RO systems, dual high-pressure pump configurations (duty + standby) are widely used to ensure:
•Continuous operation
•Reduced downtime
•Improved system reliability
However, improper switching to the standby high-pressure pump can cause serious consequences, including membrane shock, pressure surges, seal damage, and sudden water quality deterioration.
This article outlines the essential steps and best practices operators must follow when switching to a standby high-pressure pump safely and effectively.
Why Proper Pump Switching Is Critical
High-pressure pumps directly affect:
•Operating pressure
•Flow distribution
•Recovery rate
•Membrane mechanical stress
A rushed or incorrect switch can result in:
❌ Instant membrane damage
❌ Pressure gauge shock and vibration
❌ Abnormal permeate conductivity
❌ Pump cavitation or seal failure
Step 1: Confirm the Reason for Switching
Before switching, clearly identify why the standby pump is needed:
•Scheduled maintenance
•Abnormal noise or vibration
•Bearing temperature rise
•Seal leakage
•Electrical or motor alarm
Never switch blindly without diagnosing the original pump condition.
Step 2: Gradually Reduce Load on the Running Pump
Before stopping the active pump:
•Slowly close the concentrate control valve
•Reduce system pressure smoothly
•Lower flow to minimum stable operation
⚠ Never stop a high-pressure pump under full load.
Step 3: Stop the Running Pump Properly
•Follow the standard shutdown sequence
•Confirm pressure drops to near zero
•Ensure no backflow or reverse rotation
Sudden stops under pressure may damage:
•Mechanical seals
•Check valves
•Membrane elements
Step 4: Inspect the Standby Pump Before Starting
Before starting the standby pump, confirm:
Mechanical Checks
✔ Pump casing filled with water (no air)
✔ No visible leakage
✔ Shaft rotates freely
Valve Status
✔ Inlet valve fully open
✔ Outlet valve slightly open (not fully closed)
✔ Check valves functioning properly
Electrical Checks
✔ Correct rotation direction
✔ No active alarms
✔ Normal motor insulation and grounding
Step 5: Fully Vent Air from the Pump and Pipeline
Air trapped in:
•Pump casing
•High-pressure pipeline
can cause:
❌ Cavitation
❌ Pressure fluctuations
❌ Flow instability
✔ Open vent valves
✔ Allow continuous water discharge until air is fully removed
Never start a high-pressure pump with trapped air.
Step 6: Start the Standby Pump at Low Load
•Start with outlet valve partially open
•Gradually increase pressure
•Monitor pressure rise rate
Avoid:
❌ Sudden pressure spikes
❌ Rapid flow acceleration
Step 7: Slowly Restore Normal Operating Conditions
Gradually adjust:
•System pressure
•Concentrate flow
•Recovery rate
Observe:
•Inlet pressure
•Outlet pressure
•Permeate flow
•Permeate conductivity
Allow the system to stabilize for 10–30 minutes.
Step 8: Closely Monitor Key Parameters After Switching
During the first hour, closely monitor:
•Pressure stability
•Pump vibration and noise
•Seal leakage
•Flow balance
•Product water quality
Any abnormal trend indicates:
•Incorrect valve position
•Hidden air pockets
•Mechanical issues
Common Mistakes to Avoid During Pump Switching
❌ Starting the standby pump at full load
❌ Forgetting to vent air
❌ Ignoring rotation direction
❌ Closing outlet valves completely
❌ Skipping post-switch monitoring
Best Practice Recommendation
✔ Perform periodic test runs of the standby pump
✔ Keep pump switching procedures documented
✔ Train operators with real switching drills
✔ Log all pump switching events and operating data
Conclusion
Switching to a standby high-pressure pump is not a simple on/off action—it is a critical operational procedure that directly affects system safety and membrane life.
By following structured steps—pressure unloading, inspection, air venting, gradual startup, and close monitoring—operators can ensure a smooth transition, protect RO membranes, and maintain stable system performance.


Request More Information or Expert Advice
Share a few details, and we’ll provide deeper insights, tailored suggestions, or product support.
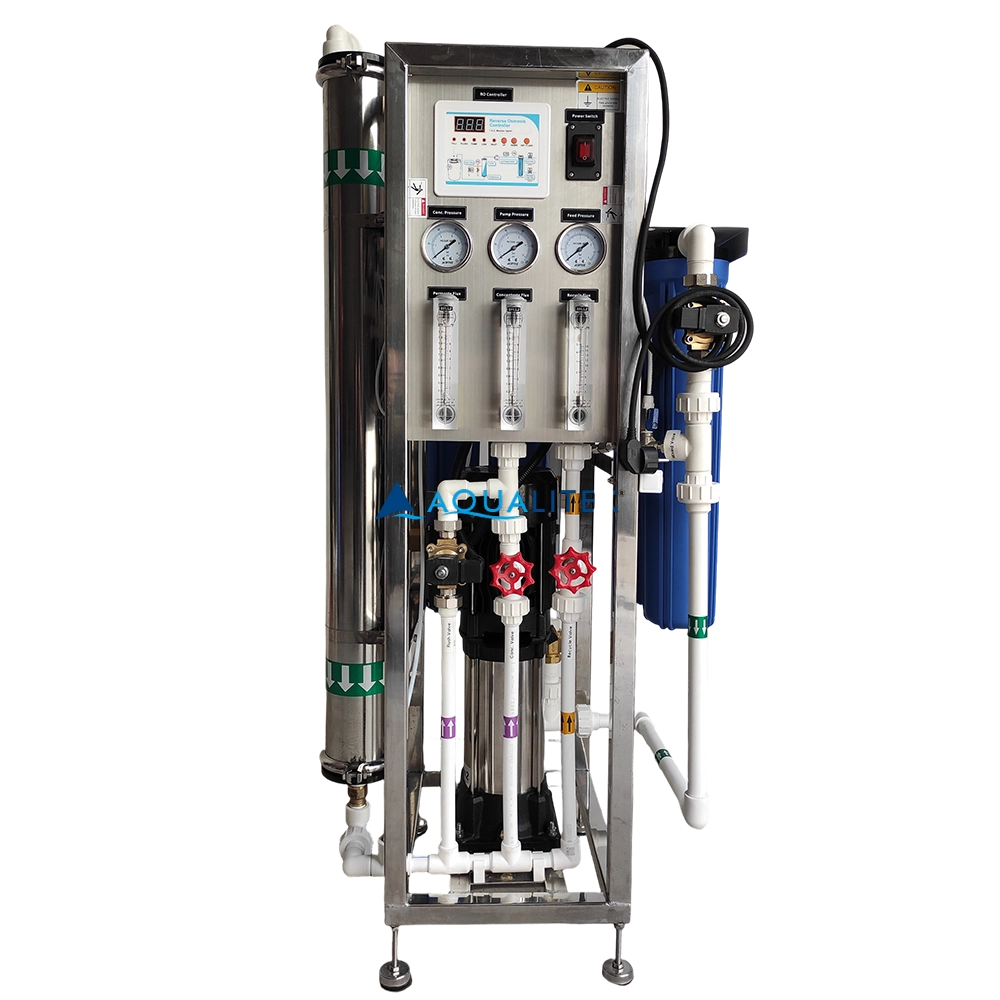
Our 500 LPH Reverse Osmosis (RO) System is engineered to provide high-quality purified water for commercial applications. Designed with advanced RO technology, durable components, and a user-friendly interface, this system ensures consistent performance, low maintenance, and long-term reliability.
With its compact design and robust skid-mounted frame, it’s an excellent choice for businesses that demand efficiency and quality in water purification.

Activated Carbon Filter (ACF)
Our Activated Carbon Filter (ACF) is a highly effective water filtration system designed to remove chlorine, organic compounds, unpleasant odors, and harmful contaminants from water. Utilizing activated carbon’s high adsorption capacity, ACFs efficiently trap and eliminate impurities, improving taste, color, and overall water quality. These filters are widely used in industrial, commercial, and residential applications, serving as a critical pre-treatment step for processes like reverse osmosis (RO) and drinking water purification. With their ability to enhance water safety and meet stringent quality standards, Activated Carbon Filters play a vital role in various water treatment systems.
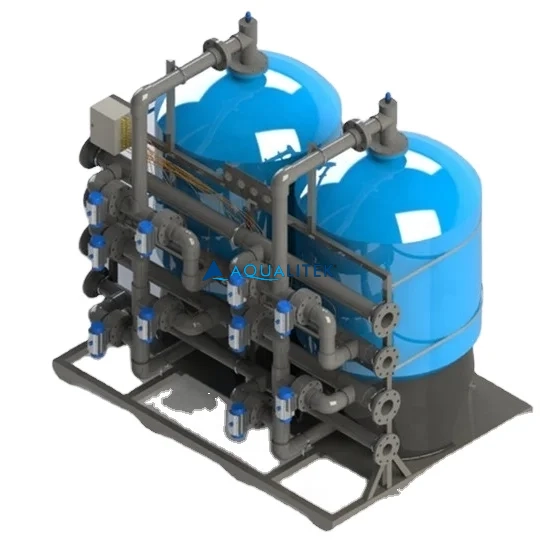
Multi-Media Filter (MMF)
Our Multi-Media Filter (MMF) is a highly efficient water filtration system designed to remove suspended solids, turbidity, and other impurities from water. Unlike single-media filters, MMFs use multiple layers of filtration media—such as sand, anthracite, and gravel—each with varying sizes and densities.
This layered structure allows for superior filtration, increased dirt-holding capacity, and longer operational cycles.
Multi-Media Filters are widely used in industrial, municipal, and commercial water treatment applications, serving as a crucial pre-treatment step for processes like reverse osmosis (RO) and ultrafiltration (UF). By ensuring cleaner water and reducing maintenance needs, MMFs enhance the overall efficiency of water treatment systems.

AQUALITEK 20 TPH Uninterrupted (1 Working + 1 Standby) Ultrafiltration System delivers continuous, energy-efficient water purification for industry. Industrial Ultrafiltration System 20 TPH; 20 TPH Ultrafiltration Water Treatment Plant — high flux, low maintenance, reliable performance.
Copyright © 2025 AQUALITEK. All rights reserved.
AQT
AQT