Is Replacing the Filter in an RO Water Purifier Complicated? Can You Do It Yourself?| Insights by AQUALITEK
Learn whether you can replace RO water purifier filters on your own, how difficult the process is, and what precautions to take. A complete step-by-step guide to help you perform safe, effective filter replacement at home.
- Introduction
- 1. Is RO Filter Replacement Difficult?
- 2. Which Filters Can You Replace Yourself?
- 3. Tools and Materials You’ll Need
- 4. Step-by-Step: How to Replace Your RO Filter
- Step 1: Turn Off Power and Water Supply
- Step 2: Release Pressure
- Step 3: Remove the Old Filter
- Step 4: Insert the New Filter
- Step 5: Restore Water Supply and Flush
- 5. Safety and Maintenance Tips
- 6. Benefits of DIY Filter Replacement
- 7. When to Call a Professional
- Conclusion
Introduction
Replacing filters is a crucial part of maintaining any reverse osmosis (RO) water purifier. Over time, filters accumulate impurities and lose efficiency, which can affect water taste, flow rate, and safety.
But many users wonder:
“Is replacing the filter complicated? Can I do it myself, or do I need a technician?”
The short answer is — yes, you can replace it yourself, provided you follow the correct steps and safety measures. This article will help you understand how filter replacement works, when it’s needed, and what to be careful about.
1. Is RO Filter Replacement Difficult?
Not really — most modern RO systems are designed for easy maintenance. Manufacturers understand that users prefer convenience, so filters often come with quick-connect fittings, modular housings, or twist-lock cartridges.
The level of difficulty mainly depends on the system type:
|
System Type |
Replacement Difficulty |
Comment |
|
Under-sink RO System |
Moderate |
May need basic tools and space under sink |
|
Wall-mounted or Integrated RO Purifier |
Easy |
Tool-free twist-type filters common |
|
Commercial RO System |
Advanced |
Requires technician due to pressure and size |
For most household RO systems, replacing pre-filters (like PP cotton or activated carbon) is straightforward and can be done in 10–20 minutes.
2. Which Filters Can You Replace Yourself?
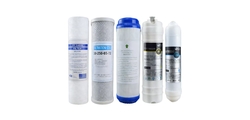
You can safely replace most pre-filters and post-filters at home.
|
Filter Type |
User Replaceable? |
Notes |
|
PP Cotton (Sediment Filter) |
✅ Yes |
Simple to remove and reinstall |
|
Activated Carbon Filter (GAC/CTO) |
✅ Yes |
Usually twist or housing type |
|
Post Carbon (T33) |
✅ Yes |
Often connected by quick fittings |
|
RO Membrane |
⚠️ Yes, but requires care |
Avoid touching membrane surface |
|
UV Lamp or Pump Components |
❌ No |
Should be handled by technician |
If your purifier has auto-flush or pressure components, consult the user manual before performing any maintenance.
3. Tools and Materials You’ll Need
Before you begin, prepare the following:
•New replacement filters (check model compatibility)
•Filter wrench (for housing-type systems)
•Clean cloth or towel
•Food-grade lubricant (optional for O-rings)
•Gloves and a container for drained water
4. Step-by-Step: How to Replace Your RO Filter
Step 1: Turn Off Power and Water Supply
Unplug the purifier and close the feed water valve to avoid leakage or short circuit.
Step 2: Release Pressure
Open the faucet to drain any remaining water and reduce internal pressure.
Step 3: Remove the Old Filter
•Use a wrench or unlock the twist cap (depending on system type).
•Take out the old filter cartridge carefully.
•Wipe the housing clean with a damp cloth.
Step 4: Insert the New Filter
•Place the new filter in the correct direction (check arrows or labels).
•Ensure O-rings are properly seated and not twisted.
•Tighten the housing or lock the cartridge securely.
Step 5: Restore Water Supply and Flush
•Turn the water back on and check for leaks.
•Allow water to flush for 5–10 minutes to remove carbon dust or air bubbles.
•For RO membranes, discard the first tank of water after replacement.
5. Safety and Maintenance Tips
✅ Always use genuine or compatible filters — low-quality copies may damage your system.
✅ Flush properly after every replacement to remove carbon fines and protect the membrane.
✅ Do not overtighten housings — this may crack the casing or damage O-rings.
✅ Keep track of replacement dates — label filters with installation time.
✅ If unsure, call for professional support — especially for electrical or high-pressure units.
6. Benefits of DIY Filter Replacement
⚙️ Save money – no need for service visits for routine filter changes.
⚙️ Gain confidence – learn how your system works internally.
⚙️ Ensure timely maintenance – no delays waiting for technician schedules.
⚙️ Eco-friendly practice – encourages conscious maintenance habits.
Replacing filters yourself is safe and simple — as long as you follow the correct steps and use quality components.
7. When to Call a Professional
While most pre-filters are easy to replace, professional service is recommended if:
•The system shows error codes or alarm lights.
•You notice water leakage or electrical issues.
•The RO membrane housing is difficult to access.
•The pump or UV components need maintenance.
Conclusion
Replacing filters in an RO water purifier is not complicated for most household systems. With basic preparation and attention to detail, you can easily perform the process yourself in under 30 minutes.
By learning how to replace filters properly, you ensure consistent water quality, longer system life, and lower maintenance costs — all while taking a proactive role in your family’s health and sustainability.


Request More Information or Expert Advice
Share a few details, and we’ll provide deeper insights, tailored suggestions, or product support.

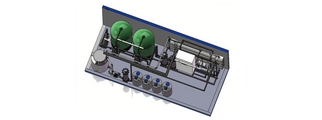
Our 500 LPH Reverse Osmosis (RO) System is engineered to provide high-quality purified water for commercial applications. Designed with advanced RO technology, durable components, and a user-friendly interface, this system ensures consistent performance, low maintenance, and long-term reliability.
With its compact design and robust skid-mounted frame, it’s an excellent choice for businesses that demand efficiency and quality in water purification.

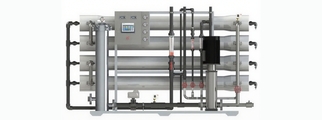
30TPH Industrial Reverse Osmosis (RO) System designed for industrial and municipal water treatment. High salt rejection, energy-efficient design, PLC control, and customizable configuration.

AQUALITEK's 500LPH Panel Mounted Reverse Osmosis Water Purification System delivers reliable 500 LPH RO water production. This compact industrial reverse osmosis unit is ideal for small scale industrial RO needs, ensuring efficient and high-quality purified water in a space-saving design.

Electrodeionization (EDI) system is an advanced water purification technology that combines ion exchange and electrochemical processes to produce ultra-pure water. Unlike traditional deionization methods, which rely on chemical regeneration, EDI utilizes electric fields to drive the movement of ions through ion-exchange membranes, effectively removing dissolved salts and other ionic contaminants.
This process is continuous and does not require the use of chemicals for regeneration, making it an environmentally friendly and cost-effective solution for producing high-quality deionized water. EDI systems are widely used in applications requiring ultrapure water, such as in the pharmaceutical, semiconductor, power generation, and biotechnology industries, as well as for laboratory use.
By offering high-purity water without the need for chemical regeneration, EDI systems provide a sustainable, efficient, and reliable alternative to traditional deionization methods, making them an ideal choice for industries where water quality and process control are critical.
© 2026 AQUALITEK. All rights reserved.




AQUALITEK- Aimee Hoo
AQUALITEK - Aimee Hoo